What You’ll Need for this Project
- Raspberry Pi 4 (opens in new tab) or Raspberry Pi 3
- 8 GB (or larger) microSD card (see best Raspberry Pi microSD cards) with a fresh install of Raspberry Pi Lite OS or Raspberry Pi OS with Desktop.
- Power supply/Keyboard/Mouse/Monitor/HDMI Cable (for your Raspberry Pi)
- Optional (Recommended): Heatsinks and fan (opens in new tab) for your Raspberry Pi (opens in new tab)
- Optional: Solar Panel Power Bank with USB-C (opens in new tab)
- Optional: Raspberry Pi Cluster Case with Heatsinks and Fans (opens in new tab)
This tutorial is based on terminal commands. If you are not familiar with terminal commands on your Raspberry Pi, we highly recommend reviewing 25+ Linux Commands Raspberry Pi Users Need to Know first
How to Mine for Cryptocurrency on Raspberry Pi
We will start by creating our account with Minergate, a cryptocurrency mining pool with 3.5 million users worldwide for Bitcoin Gold, Zcash, Ethereum, Ethereum Classic, and Monero. This tutorial is specific to mining Monero as it was the only cryptocurrency I had any level of success with.

2. Boot your Raspberry Pi. If you don’t already have a microSD card see our article on how to set up a Raspberry Pi for the first time or how to do a headless Raspberry Pi install.
3. If you are using Raspberry Pi OS with Desktop, open a Terminal, or press Ctrl-T. If you are using Raspberry Pi Lite, login as you would normally.
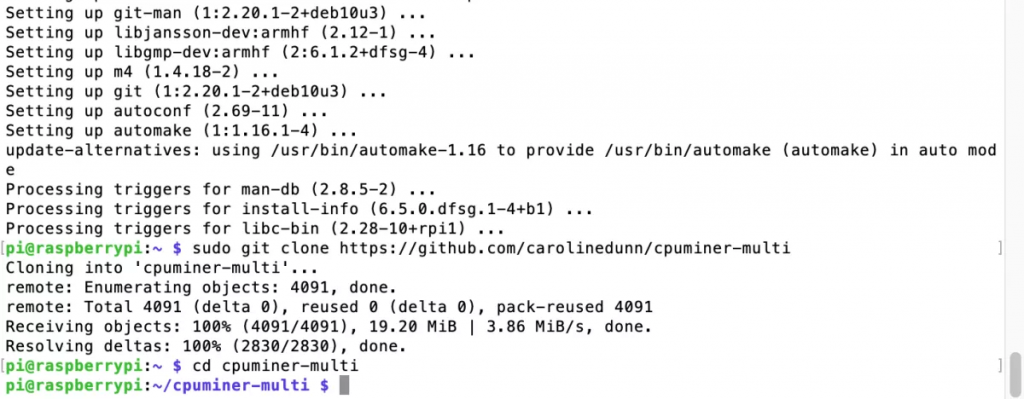
4. Once in your terminal, run the following updates and install the necessary dependencies:
sudo apt-get update && sudo apt-get upgrade -y
sudo apt install git automake autoconf libcurl4-openssl-dev libjansson-dev libssl-dev libgmp-dev
cd cpuminer-multi

5. Now, let’s compile the mining code with the following three commands. This step will take a couple of minutes on a Raspberry Pi 4.
sudo ./autogen.sh
sudo ./configure
sudo ./build.sh

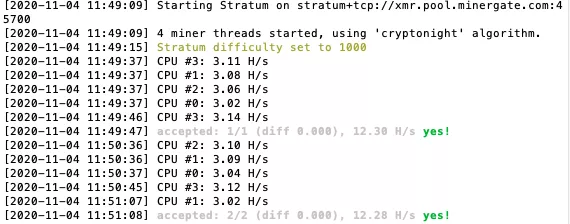
6. After building and configuring our mining software on our Raspberry Pi, let’s start mining for Monero! Enter the following terminal command to start the miner, replacing YOUR_EMAIL with the email address you used to signup for your Minergate account.
./cpuminer -a cryptonight -o stratum+tcp://xmr.pool.minergate.com:45700 -u YOUR_EMAIL
You should see the mining software start and hopefully see a few shares ‘accepted’ with ‘yes!’

7. Let’s check your Minergate Dashboard by logging into https://minergate.com/internal. You can do this on a Chromium browser if using Raspberry Pi Desktop, or on your PC. Scroll down your dashboard until you see Monero. If everything is working, your Monero Status will indicate ONLINE. Congratulations! You’re now mining for Monero!

How to Start Raspberry Pi Crypto Mining on Boot
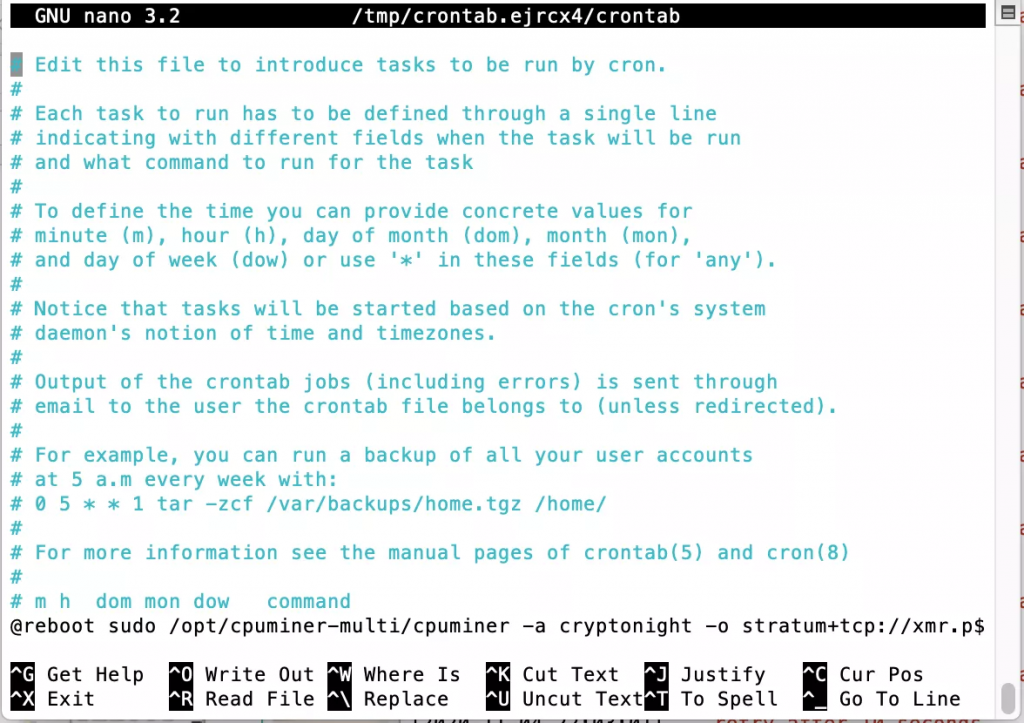
To automatically start our cryptocurrency miner on boot on our Raspberry Pi, we’ll use the Crontab method.
crontab -e
If you haven’t set the crontab previously, you’ll see the response “no crontab for pi, Select an editor.”
1. Type ‘1’ and hit Enter.
2. This will open a new crontab file, arrow down to the bottom of your crontab file and enter the command below, replacing YOUR_EMAIL, with the email address you used when creating your Minergate account

@reboot sudo /cpuminer-multi/cpuminer -a cryptonight -o stratum+tcp://xmr.pool.minergate.com:45700 -u YOUR_EMAIL
4. Press Ctrl-X, and y to save your crontab.
5. Now reboot your Pi by typing ‘sudo reboot’ in your Terminal.


İlk Yorumu Siz Yapın